Firebase feat React 简易教学 (三):Authentication 会员帐号管理

Firebase 系列文的第三篇,这篇文章会简单介绍如何使用 Firebase 的 Authentication 功能来管理会员帐号。
相信很多使用者都对网站的会员功能常有资安的疑虑,担心自己的帐密会不会被网站拿去做什么其他的用途, 事实上网站的开发者更讨厌去管理使用者的帐密,尤其是个资法有相当多的限制,对帐密这类的资讯是能不碰就不碰, 但网站有时不得不需要有会员的功能,这时第三方的会员帐号管理就很好用了。
而 Firebase 就提供 Authentication 的功能,简单的说就是网站不直接管理使用者的帐密,而是透过 Firebase (Google) 去管理,如果有资安的问题就是 Google 的问题,和网站无关
前置作业
如果还没有建置专案及安装 Firebase SDK 的话,请先参考【Firebase feat React 简易教学 (一):简介&快速 hosting 新网站】
新增登入方式 - 电子邮件/密码
Firebase 提供原生的「电子邮件/密码」和第三方登入,先新增原生的「电子邮件/密码」登入,虽然需要使用者填入密码,但是网站开发者是看不到的,由 Firebase 托管
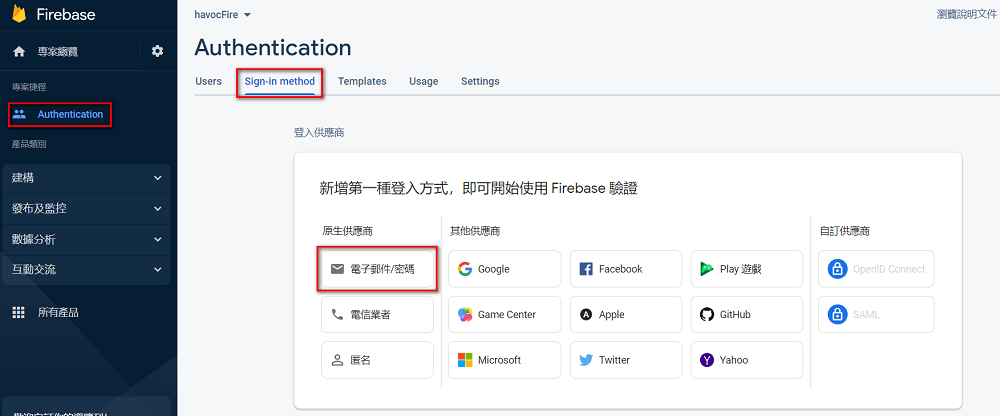
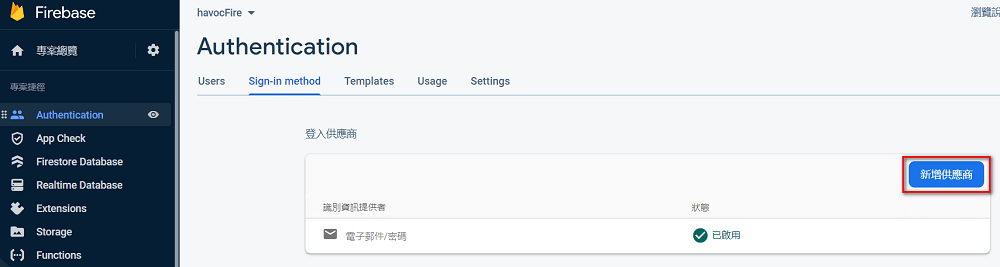
先点选左侧 menu 的 Authentication,然后选择「Sign-in method」,选择「电子邮件/密码」
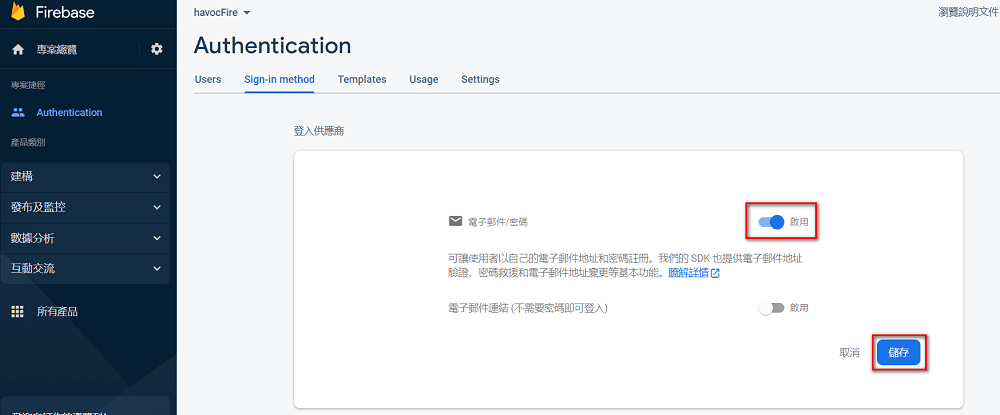
��选择「启用」
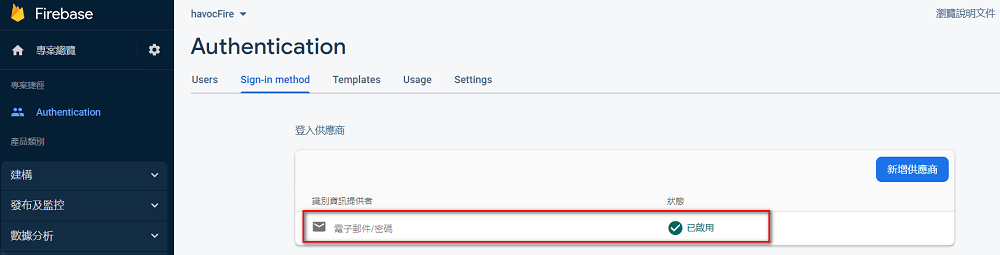
然后就可以在登入供应商列表看见
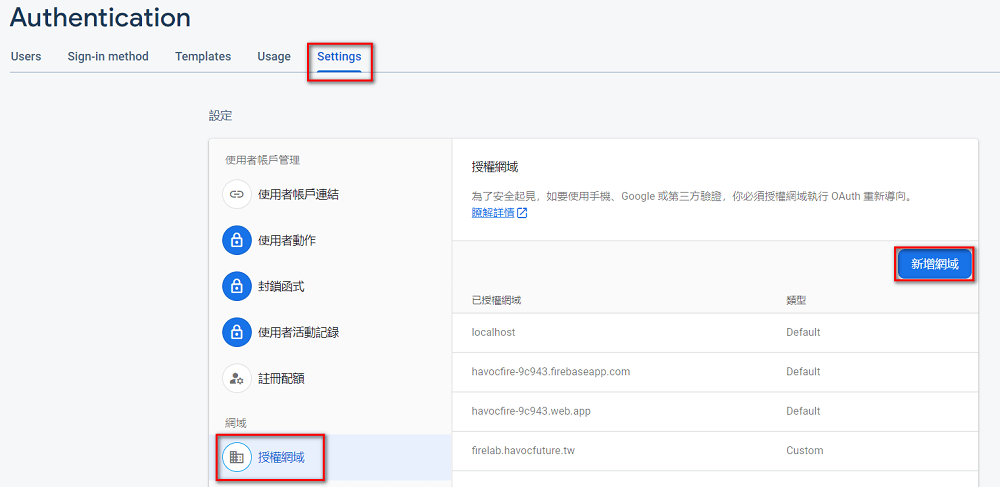
注意:网站放到 internet 需要「授权网域」,ex: 我测试的网站网址为:https://firelab.havocfuture.tw 就必须先新增这个网域,要不然会没有权限
程式码整理
整理了一下程式码如下:
需要先 initialize authentication
import { initializeApp } from "firebase/app";
import { getAuth } from "firebase/auth";

const firebaseConfig = {
  // ...
};

// Initialize Firebase
const app = initializeApp(firebaseConfig);
// Initialize Firebase Authentication
const auth = getAuth(app);
注册
import { getAuth, createUserWithEmailAndPassword } from "firebase/auth";

const auth = getAuth();
createUserWithEmailAndPassword(auth, email, password)
	.then((userCredential) => {
		// 注册成功
		const user = userCredential.user;
		console.log(user);
	})
	.catch((error) => {
		// 注册失败
		const errorCode = error.code;
		const errorMessage = error.message;
		console.log(errorCode);
		console.log(errorMessage);
	});
登入
import { getAuth, signInWithEmailAndPassword } from "firebase/auth";

const auth = getAuth();
signInWithEmailAndPassword(auth, email, password)
	.then((userCredential) => {
		// 登入成功
		const user = userCredential.user;
		console.log(user);
	})
	.catch((error) => {
		// 登入失败
		const errorCode = error.code;
		const errorMessage = error.message;
		console.log(errorCode);
		console.log(errorMessage);
	});
登出
import { getAuth, signOut } from "firebase/auth";

const auth = getAuth();
signOut(auth).then(() => {
  // 登出成功
}).catch((error) => {
  // error
});
判断是否登入
import { getAuth, onAuthStateChanged } from "firebase/auth";

const auth = getAuth();
onAuthStateChanged(auth, (user) => {
  if (user) {
	// 已登入
    const uid = user.uid;
	console.log(uid);
  } else {
	// 未登入
  }
});
新增登入方式 - Google 帐户
用 Google 或 FB 帐号登入算很方便的功能,不需要再重新注册帐号,Firebase 也提供这些第三方登入方式,不过 FB 还要回 FB Developers 申请应用程式开发,太麻烦懒得试,所以只测试了用 Google 帐户登入
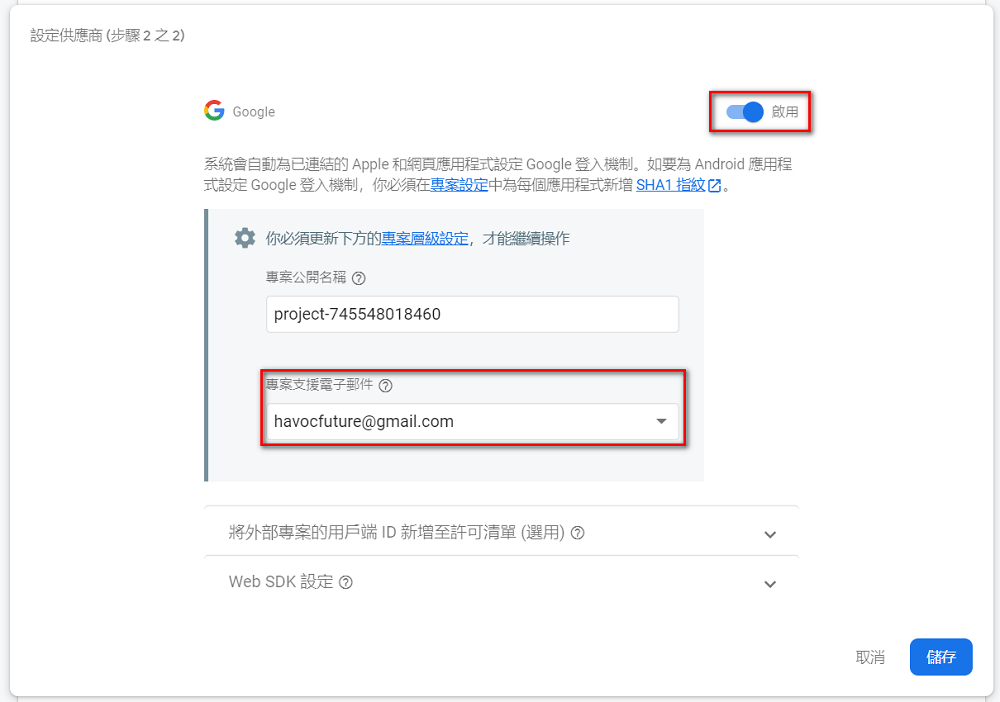
选择「新增供应商」,选「Google」
启用
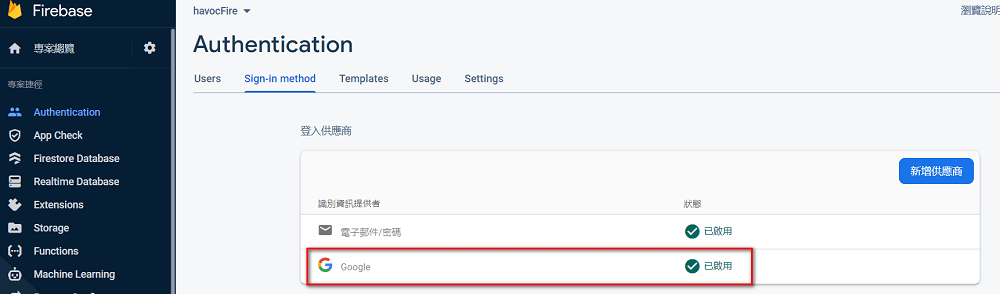
就可以看到在原来的 电子邮件/密码 外多看到「Google」
程式码整理
同样整理一下程式码如下:
需先宣告 Google Provider
import { GoogleAuthProvider } from "firebase/auth";

const provider = new GoogleAuthProvider();
登入
这个登入方式是常见的会跳出 popup 视窗那种,登入成功后会回到主画面
import { getAuth, signInWithPopup, GoogleAuthProvider } from "firebase/auth";

const auth = getAuth();
signInWithPopup(auth, provider)
	.then((result) => {
		// 登入成功,取得 token、user
		const credential = GoogleAuthProvider.credentialFromResult(result);
		const token = credential.accessToken;
		const user = result.user;
		console.log(token);
		console.log(user);
	}).catch((error) => {
		const errorCode = error.code;
		const errorMessage = error.message;
		const credential = GoogleAuthProvider.credentialFromError(error);
		console.log(errorCode);
		console.log(errorMessage);
		console.log(credential);
	});
然后「登出」、「判断是否登入」同上,就不再重覆说明
大致上还算简单,写了个测试页面 https://firelab.havocfuture.tw/ ,点右上角的登入就可以玩玩,目前测试专案很阳春,没什么功能,有后续测试功能会陆续的补上去
